At the village, Meikson had received news of his fathers death at the hands of the Normans. Now being the new Warlord, he would not let his village be sacked. Hastily sending to his Uncle Alfarr for reinforcements, he then sent the peasants to the hills and waited for whatever men he could gather to his banner. Would they arrive before the Normans? One thing was sure, the Normans would pay dearly to take this village!
Note: in order to keep the narrative going, we decided to run a modified Homeland scenario. The Anglo-Danes were automatically the defenders with one point less than the Normans to reflect the situation and the Homeland rules on defending. As the Normans had recently lost so many Knights, we decided to run with 4 point forces (3 for the Danes) and making use of the troops leftover that were not used in the first game.
Special Rules: "War Banners" were used from the Raven's Shadow supplement. The optional rule on the second player having 3 Saga dice to start with was used (Raven's Shadow page 26).
Anglo-Dane Forces:
Meikson, eldest son of Meik (Warlord)
Hearthguard (8 with banner)
Hearthguard
Norman Forces:
Baron Harry the Youthful (Warlord)
Mounted Knights
Warriors (spear and shield)
Warriors (crossbows)
Levy (bows)
Deployment:
 |
| Normans prepare to sack the village.... maybe there is someone at home to defend it though? |
Action:
.JPG) |
| Yes, 4 hearthguard in one building and 8 in another with a Banner and their Warlord! |
 |
| Turn 1 Normans: The Normans start off with some shooting - uh oh - No hits. |
 |
| Turn 1: Using the optional rule from Raven's shadow: Danes start with 3 dice. Shieldwall helps against the shooting at the Danes in houses. |
 |
| While the shooting does nothing, the rest of the Normans move up on the village huts |
 |
| Turn 1 Anglo-Danes: They save Shieldwall for the next offensive and use Trapped to put Fatigue on the approaching Normans! |
 |
| Turn 2 Normans: Moving in for the kill.... |
 |
| The Norman spearmen attack the head hut..... knock knock..... |
 |
| The Normans only manage to kill one Dane.... |
.JPG) |
| View from the top... the Danes fight back killing 6 Norman Warriors... |
 |
| Turn 2: Danes put the hurt on the Normans again - it's tiring to take a building! |
 |
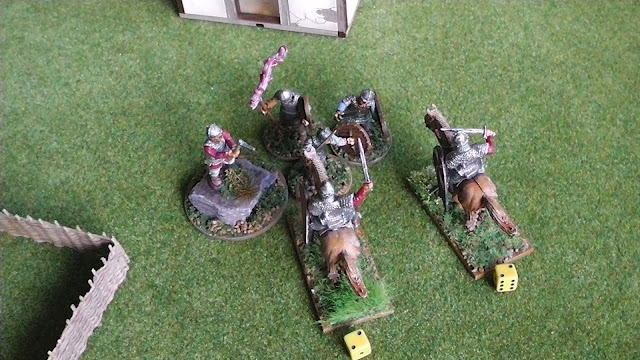
| Having been pushed back, the Norman spearmen keep out of it to keep the ole Saga dice up... here comes the cavalry! |
 |
| Turn 3: Normans: Cavalry preparing to go in for the kill....? |
 |
| Turn 3: Danes: Once again, the Danes use a Saga die on Noble Lineage to convert another to a rare symbol to get Trapped to work. |
Summary:
This game ended more quickly than I had thought it would. The Attacker only has 6 turns to achieve their aim (no buildings with defenders in them). The Defenders seemed to have lost a lot of men (then suddenly turned it around by charging out and taking on the Norman Warlord directly. On their last round of action, the Norman Warlord and the Knights rolled 17 attack dice versus the defenders and killed several. In return though, the Knights were beaten off and the Danes took advantage. I must remember to count up the combat casualties more carefully. At least I remembered to make the losers fall back this game... Not sure what you do if the defenders in a building need to fall back? Back to the rulebook.
I have to say I was helped out by some great dice rolling for my Danes. The last two rounds I managed to get one Rare symbol on my Saga dice from only having four dice to roll. I combined this with the sacrifice of one more dice using the Noble Lineage special ability to create a second Rare symbol. This helped pile up the fatigue on the Norman attacking troops using the Trapped special ability. The Danes used the 2 points of fatigue on the Norman Warlord to make him easier to hit. Taking 4 damage was more than he could do anything about with only one loyal retainer left!
I didn't find the War Banner useful in this game, but it may come in useful at some point! I like the idea of the second player having 3 Saga dice to assign at the start of the game. It helps take away the Attackers first turn advantage.
Shooting at buildings seem to be a waste of time. Even with the advantage of crossbows, this was negated by the Dane special ability Shieldwall. Any Hearthguard in a building seems hard to kill, but with the use of Shieldwall....wow. I believe that the Normans could probably have won with an all Knight force, but that was the downside of losing so many Knights in our first game.
A good game and definitely time for drinks and food! I am REALLY liking Saga as I get my teeth into it.
The author has his own blog which he tries to update several times a month at www.not2oldtowargame.wordpress.com. It features painting, modelling and battle reports for Flames of War, Saga and other games.


.JPG)
